Hardware
Four analog needles, five annunciator lamps, brushed-aluminium bezel,
mounted under the monitor. ESP32 polls the daemon's /usage endpoint
at ~1 Hz and updates the cluster.
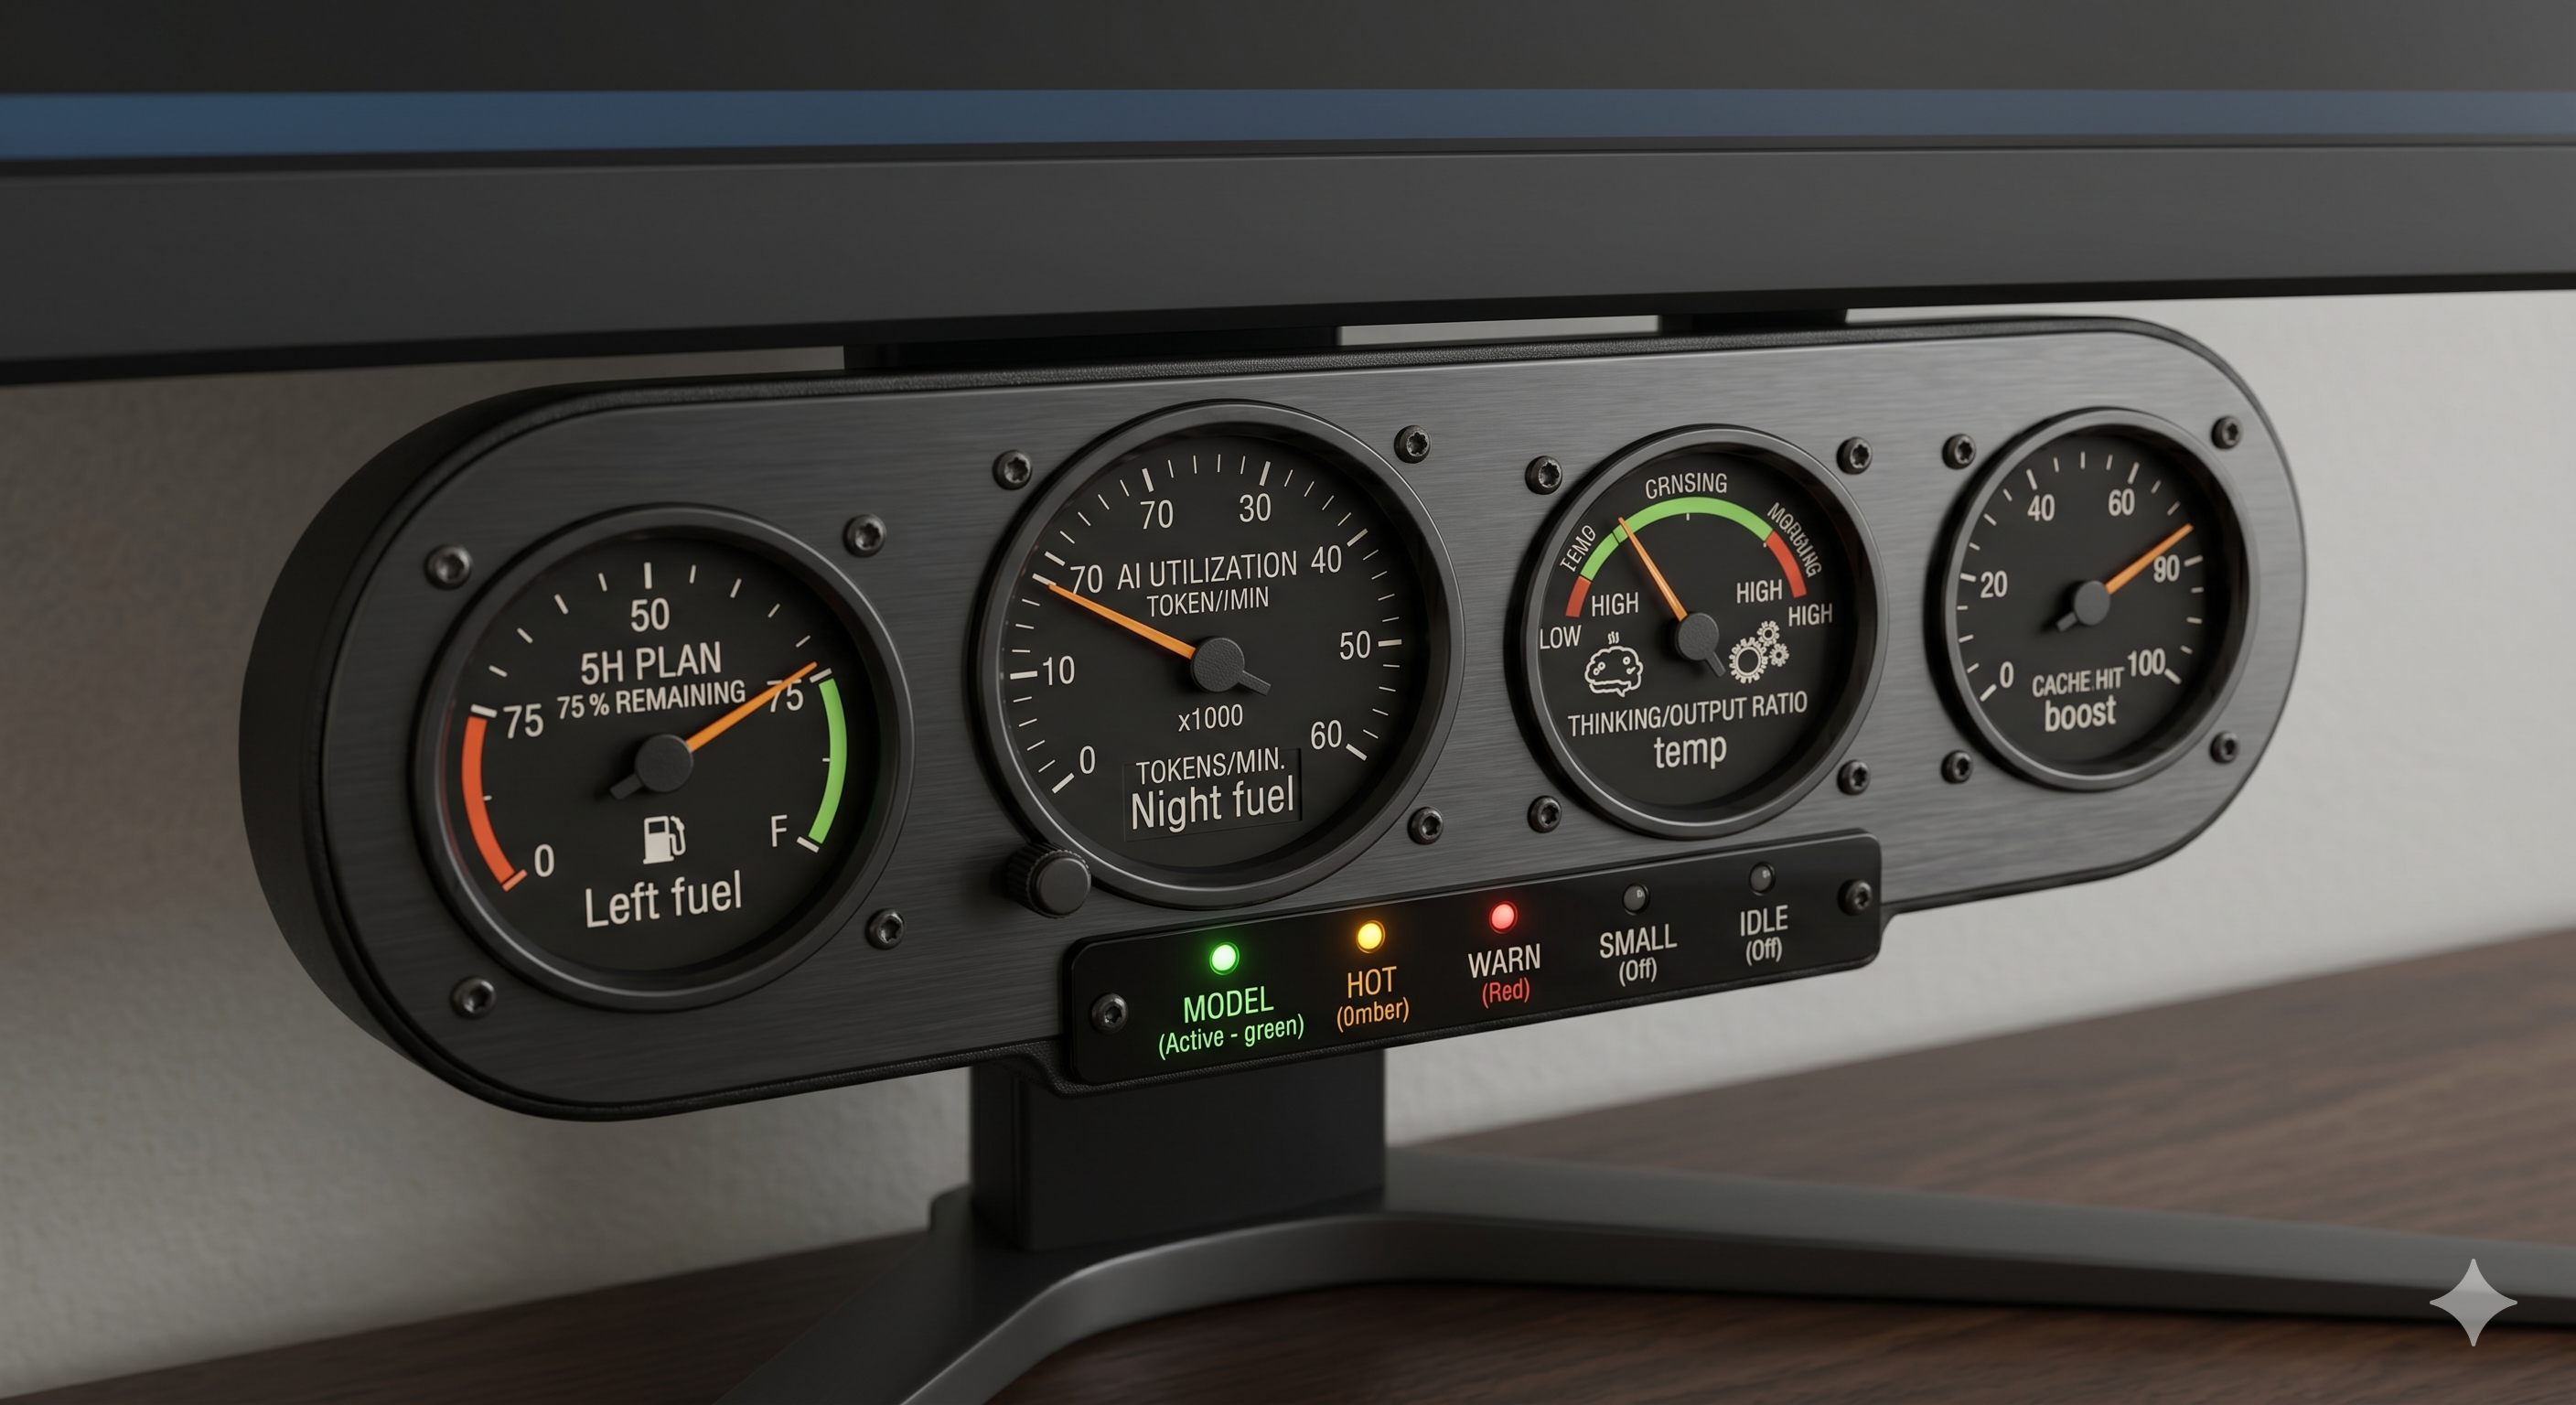
Cluster layout
Four round gauges in a single bezel, reading left to right:
| # | Label | Metric | Scale |
|---|---|---|---|
| 1 | 5H PLAN / Left fuel | % of 5h plan window used | 0 - 100% |
| 2 | TOKENS/MIN / Tach | Short-window burn rate | 0 - redline |
| 3 | THINKING/OUTPUT / Temp | Thinking vs output tokens | low - high, colour-coded zones |
| 4 | CACHE HIT / Boost | Cache read as fraction of input | 0 - 100% |
Annunciator row below the gauges, left to right:
| Lamp | Colour | Condition |
|---|---|---|
| MODEL | RGB | Red for Opus, amber for Sonnet, green for Haiku; reflects the most recent assistant message |
| HOT | Red | Tach above redline; optionally flashes |
| WARN | Amber | Fuel above 80% or cache-hit-rate below a floor |
| STALL | Blue | No telemetry for the configured silence window |
| IDLE | Green | Daemon reachable, no current activity (pulses softly) |
The 7-day window is not on the cluster. It moves too slowly to warrant a needle and lives on the deep-stats dashboard instead.
Movement
Switec X27.168 automotive stepper motor.
- 315-degree sweep
- 600 steps (~2 degrees per step with 3-degree/step gearing)
- Direct drive, no microstepping required
- ~$8 per unit from Adafruit / AliExpress
- Used in car dashboards, so bezels and faces are off-the-shelf
Sibling parts in the same family (X25, VID28, VID29, BKA30D-R5) all work with the same driver library. The X27.168 has the longest sweep and the most tutorial coverage, which is why it wins.
Driver library
clearwater/SwitecX25 Arduino C++ library. Despite the name it
covers X27.168 without modification. Drives four GPIO pins per
motor. No external driver IC strictly required for short wiring
runs; add ULN2003A darlington arrays if you want cleaner current
handling or longer wire runs.
No maintained MicroPython port exists. Firmware is therefore Arduino C++, not MicroPython. Not the original plan, but the right trade given how mature the Arduino ecosystem is for this motor.
Board
ESP32 DevKit V1 (generic).
- WiFi built in
- Enough GPIO for 3+ steppers (12 pins), 5 annunciator LEDs, one reset button
- Arduino framework via PlatformIO
- ~$8 per board
Alternatives:
- Raspberry Pi Pico W with CircuitPython — fewer tutorials for the stepper, but friendlier to iterate
- ESP32-S3 if you want USB-CDC for serial debugging without an extra USB-to-UART chip
Picking the classic ESP32 DevKit keeps part count low.
Wiring
Concrete GPIO assignments for a four-gauge cluster. Adjust to suit the specific board variant.
ESP32 DevKit V1
  +---------------- 5V  -> stepper common (via regulator if needed)
  +---------------- GND -> common ground

  Gauge 1 (5h PLAN)
    GPIO 13, 14, 27, 26  -> X27.168 #1 coil pins

  Gauge 2 (Tach)
    GPIO 25, 33, 32, 35  -> X27.168 #2 coil pins

  Gauge 3 (Thinking ratio)
    GPIO 34, 39, 36, 22  -> X27.168 #3 coil pins

  Gauge 4 (Cache hit)
    GPIO 23, 18, 19, 5   -> X27.168 #4 coil pins

  Annunciator LEDs (220R series resistors)
    GPIO 16 (R), 17 (G), 21 (B)  -> MODEL (common-cathode RGB)
    GPIO 4                       -> HOT   (red, PWM for flash)
    GPIO 2                       -> WARN  (amber)
    GPIO 15                      -> STALL (blue)
    GPIO 12                      -> IDLE  (green, PWM for pulse)

  Reset button
    GPIO 0 (boot button dual-use) or GPIO 35 with pull-up
Separate 5V rail for the steppers if you see brownouts when all four move at once. The onboard regulator is marginal under combined motor current.
Firmware structure
firmware/
  platformio.ini
  src/
    main.cpp            setup() + loop()
    wifi.cpp            connect + reconnect
    gauge.cpp           SwitecX25 wrapper; map 0-1000 to 0-600 steps
    annunciator.cpp     LED state machine
    poll.cpp            HTTP GET /usage every 1s
    config.h            daemon URL, thresholds
Poll loop:
- Every 1000 ms, HTTP GET
http://<daemon>:8080/usage - Parse JSON with ArduinoJson
- For each gauge, set target step from scaled value
- Update LED states from boolean flags and
last_model gauge.update()runs per-loop-tick; stepper moves toward target non-blocking
Firmware does not interpret: no PromQL, no ring buffers, no rolling windows. That is all daemon work. Firmware maps pre-computed floats to stepper positions and LED states.
Enclosure
V1 target:
- Brushed-aluminium bezel (3D-printed PLA + metallic spray, upgrade later)
- Cream faces with a hairline burgundy redline zone (optional house palette match with quartermaster)
- Hexagonal screws around each gauge bezel (visible in the render)
- Smoked acrylic covering the annunciator row so LEDs only appear when lit
- Matte black mounting bracket clipped to the monitor bezel
- Roughly 200 mm wide by 95 mm tall
Faces and bezels can be printed on a home 3D printer at V1 fidelity; if the project earns a V2, commission a machinist for a proper aluminium bezel.
Bill of materials (V1)
| Item | Qty | ~Cost |
|---|---|---|
| Switec X27.168 stepper | 4 | $32 |
| ESP32 DevKit V1 | 1 | $8 |
| ULN2003A driver array | 1-2 | $2 |
| RGB LED (common cathode) | 1 | $1 |
| 5 mm LEDs (red, amber, blue, green, red flash) | 4 | $2 |
| 220R resistors | 10 | $1 |
| 5 V 2 A supply | 1 | $10 |
| PLA filament + spray paint | n/a | $10 |
| Hook-up wire, headers, JST connectors | $10 | |
| Smoked acrylic scrap | 1 | $5 |
~$80-90 for V1 materials.
Calibration
After the cluster is physically assembled, run the daemon for a week and compare:
- Left fuel steady-state against
ccusage blocksor Claude's/usageoutput; tuneCLAUDE_GAUGE_5H_CEILING - Tach peaks against "Claude was really cooking" sessions; tune
CLAUDE_GAUGE_TACH_REDLINE - Cache hit rate against a session you know was cache-warm vs a cold session; confirm the needle is responsive
Recalibrate when Anthropic changes plan limits or when your daily workload shifts materially.